A Jenkins is a well-known tool in the world of DevOps. It is an open-source automation tool to build, test and deploy applications. A Jenkins comes with the basic installation and in this basic installation, there is only a Master that handles all the tasks for the continuous integration and deployment process.
Jenkins Distributed Architecture
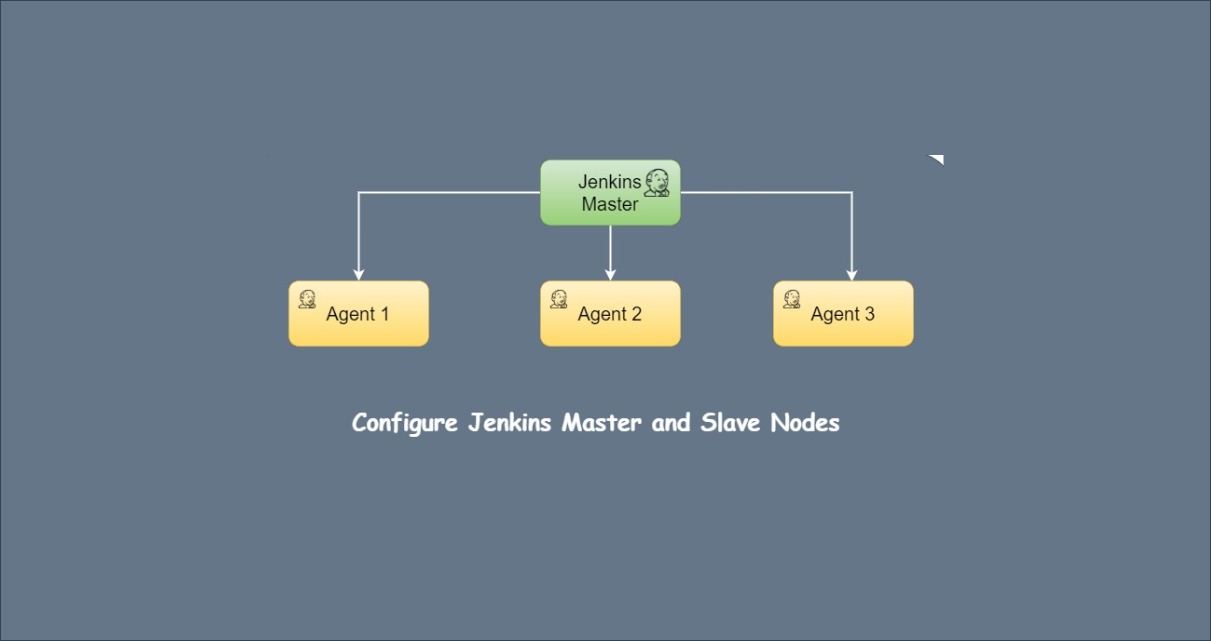
To manage distributed build Jenkins uses a Master-Slave architecture. The machine on which Jenkins is installed is called Jenkins Master and in the slave machine, a runtime program called Agent will be install. Jenkins master is responsible to distribute the task on the Slave machine. Master monitor the state of Slave machines i.e offline or online.
Steps to Configure Jenkins Master and Slave Nodes
In this step of configuration, I have taken 3 CentOs machines, one for Jenkins master and the Others are for Slave.
Jenkins Master 192.168.242.14
Jenkins Agent1 192.168.242.15
Jenkins Agent2 192.168.242.16
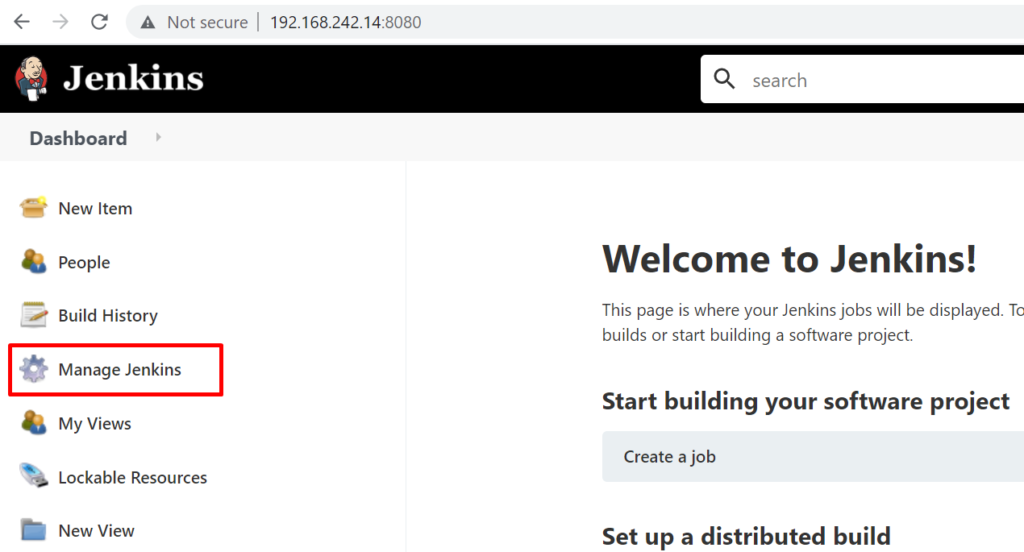
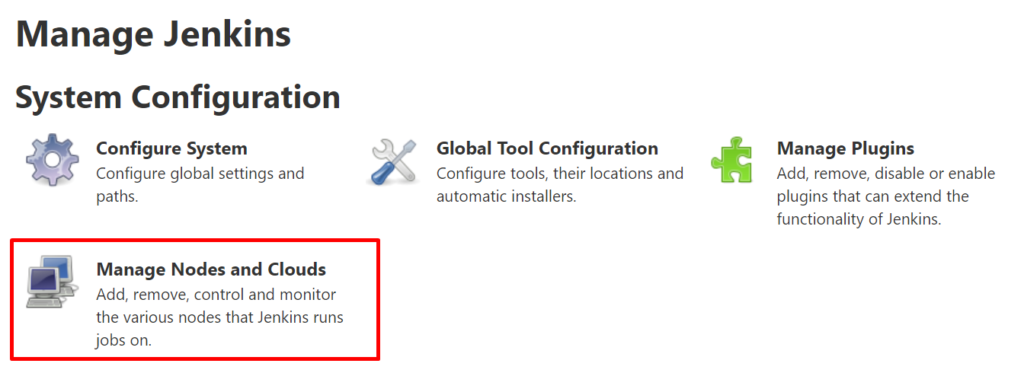
STEP 1: Click on Manage Jenkins on the left s of the Jenkins dashboard.
STEP 2: Click on Manage Nodes and Clouds under the System Configuration.
STEP 3: Click on New Node from the left sidebar, Enter the name of the node, select Permanent Agent, and hit on OK button.
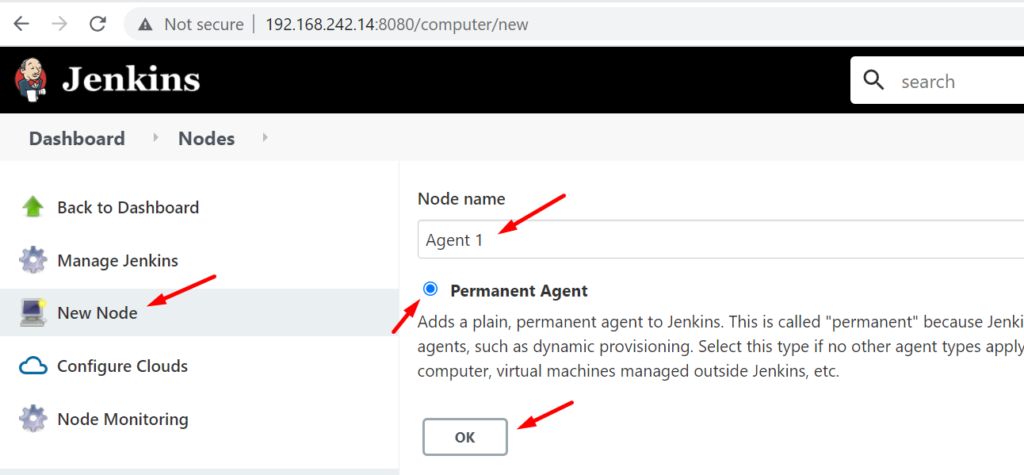
NOTE: There are two types of agents in Jenkins 1. On-Demand or Dynamic Agent or Dynamic Provisioning 2. Permanent Agent (Static Agent)
STEP 4: After the step 3, a form will be open, Enter the required information.
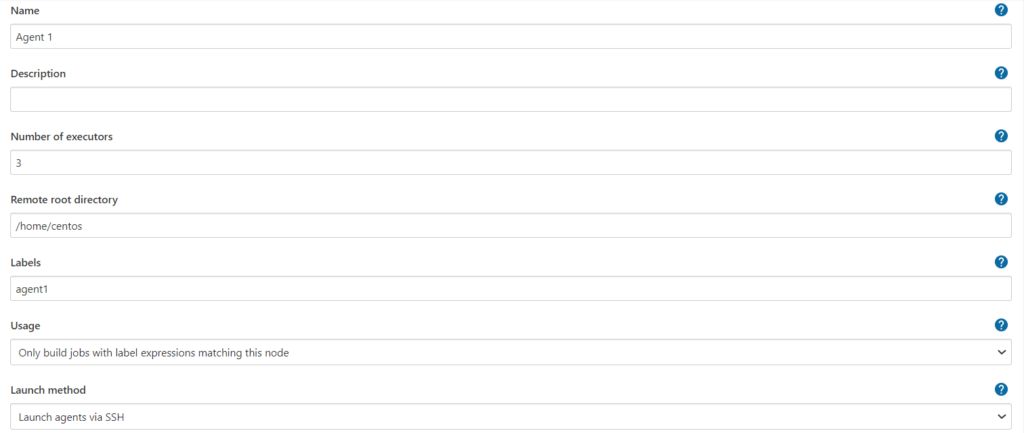
Executors: This number represents at the same time how many jobs can run in parallel in the Agent node.
Remote root directory: This is the workspace directory for the agent where it stores data downloaded by the Job.
Label: This label is very important. with the help of this label, we can explicitly tell the job where you have to run.
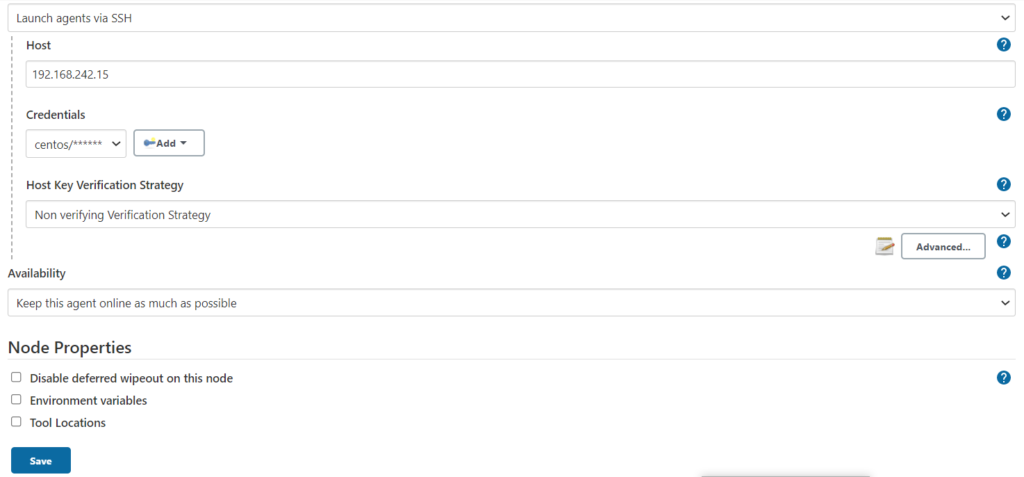
In the launch method we have to choose “Launch agent via SSH” and to connect via ssh we required an IP address, user name, and password.
Host Key Verification Strategy: If you are connecting the first time via ssh from this system then choose no verification. That’s all we have to do.
STEP 5: If you check the logs you will see the below output for the verification.

Creating a Sample Pipeline and Running on The Slave Machines
- Click New Item, Enter an item name and the Pipeline project.
- Go to the Pipeline section and select the Pipeline script option in the Definition field.
- Copy and paste following declarative Pipeline script
node('agent1'){
    stage('print_agent_1') {
        sh '''echo  Agent 1'''
    }
}
node('agent2'){
    stage('print_agent_2') {
        sh '''echo  Agent 2'''
    }
}- Save and click on Build Now button from the left sidebar.
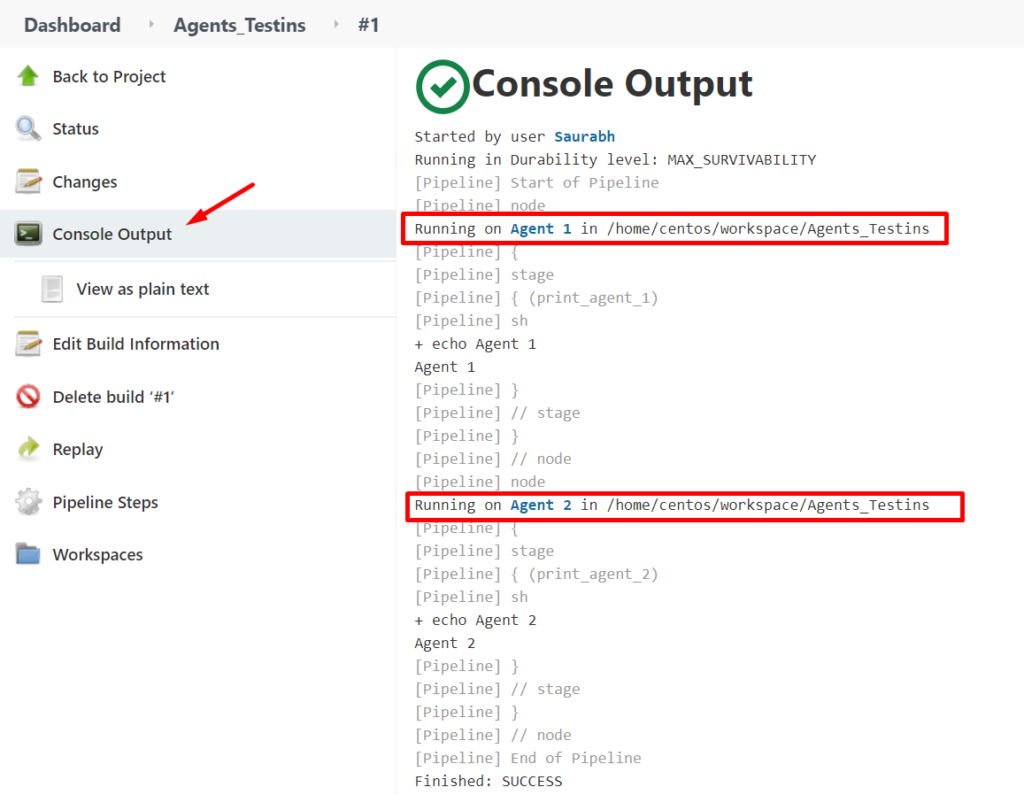
- Check the console output and here you can see the pipeline ran on the slave machines.