Introduction
GitHub Actions enables automation of software workflows directly within GitHub repositories. While GitHub provides default runners, setting up a self-hosted GitHub runner offers greater control, better security, and cost-efficiency. This article provides a comprehensive, step-by-step guide to creating your own self-hosted GitHub Action Runner.
Benefits of a Self-Hosted Runner
- Enhanced Security: Full control over the runner’s environment.
- Customization: Tailor runners to specific hardware and software requirements.
- Cost-Efficient: Utilize existing hardware or cloud resources.
- Compliance: Manage compliance requirements and privacy standards effectively.
You can set up self-hosted runners at three distinct levels:
- Enterprise-level runners configured at the enterprise level can serve all organizations within the enterprise or be limited to specific organizations.
- Organization Level Runners installed at this level can be allocated to either all repositories within the organization or selected repositories only.
- Repository-level runners set up at the repository level are exclusively available to that specific repository.
In this tutorial, I’ll demonstrate how to install the runner at the repository level.
Prerequisites
- A GitHub account and a repository.
- An EC2 instance or any running server
- Basic understanding of command-line operations.
Step-by-Step Setup
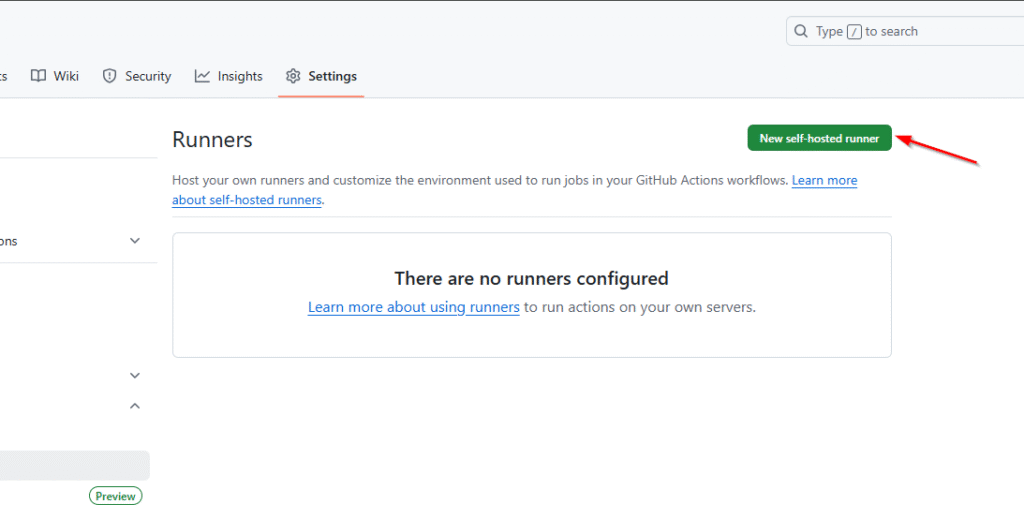
Step 1: Access Repository Settings
- Navigate to your GitHub repository.
- Click on
Settingsand selectActionsfrom the sidebar. - Click on
Runners, thenNew self-hosted runner.

Step 2: Select Runner OS
- Click on New self-hosted runner
- Choose your operating system: Linux, macOS, or Windows. And you will see some commands that you need to run on your machine.

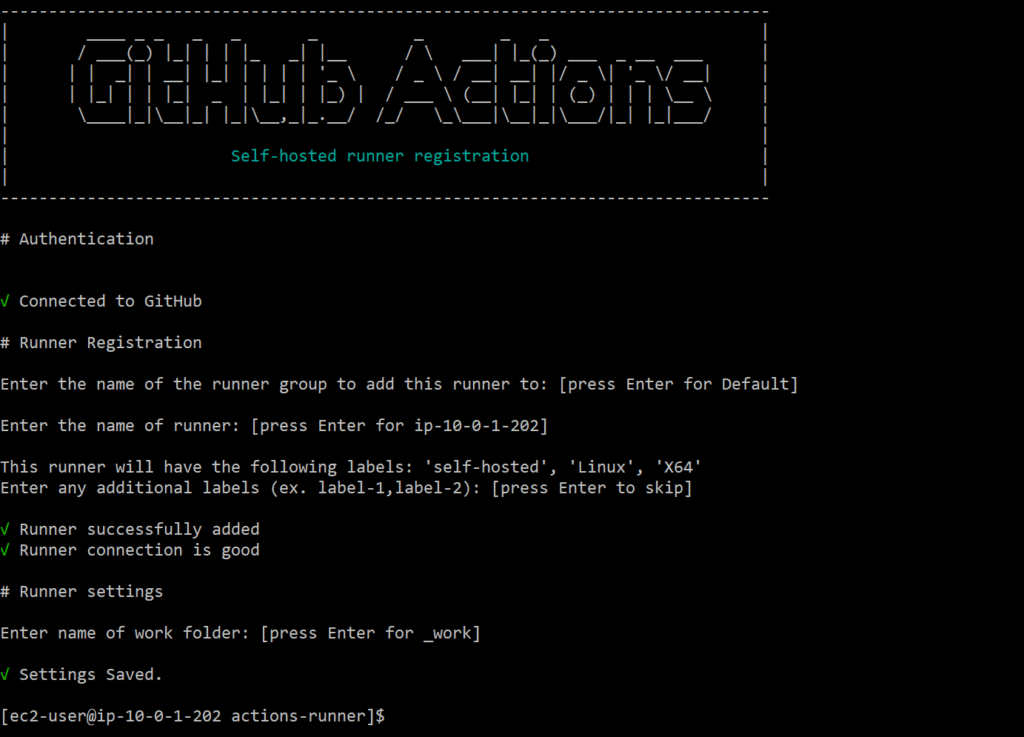
Step 3: Download and Extract the Runner
# Create a folder
$ mkdir actions-runner && cd actions-runner

# Download the latest runner package
$ curl -o actions-runner-linux-x64-2.325.0.tar.gz -L https://github.com/actions/runner/releases/download/v2.325.0/actions-runner-linux-x64-2.325.0.tar.gz

# Optional: Validate the hash
$ echo "5020da7139d85c776059f351e0de8fdec753affc9c558e892472d43ebeb518f4  actions-runner-linux-x64-2.325.0.tar.gz" | shasum -a 256 -cCopied!# Extract the installer
$ tar xzf ./actions-runner-linux-x64-2.325.0.tar.gz
Step 4: Configure the Runner
Execute the provided configuration script:
./config.sh --url https://github.com/<your-username>/<repository> --token <registration-token>Replace <your-username>, <repository>, and <registration-token> with the details provided on GitHub.
Step 5: Start the Runner
Interactive Mode:
./run.sh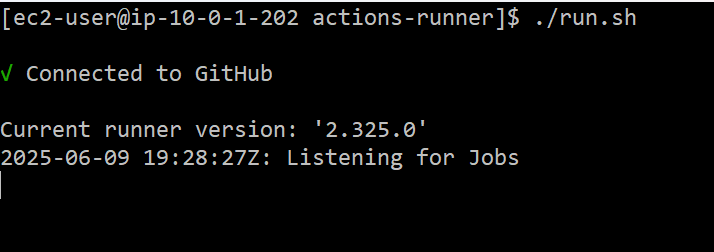
Service Mode (recommended for production):
sudo ./svc.sh install
sudo ./svc.sh start
Verify Your Runner
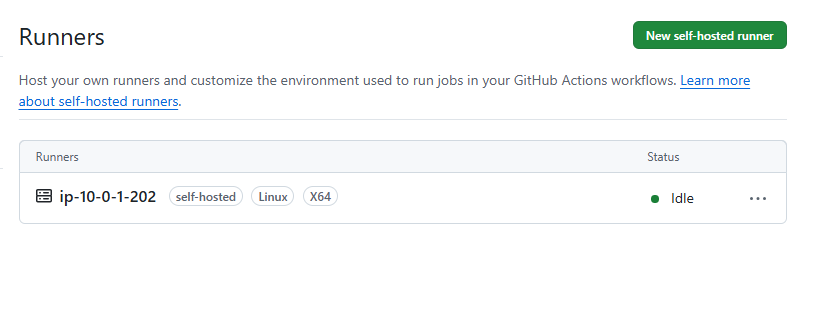
Back in the GitHub repository settings:
- Navigate to
Settings > Actions > Runners. - Confirm your runner is displayed as active and idle.
Using the Self-Hosted Runner in Workflows
Specify the runner type in your workflow file (.github/workflows/ci.yml):
name: CI

on:
  push:
    branches: [ "main" ]
  pull_request:
    branches: [ "main" ]

jobs:
  build:
    runs-on: self-hosted
    steps:
      - uses: actions/checkout@v3
      - name: Run a script
        run: |
          ls -lhtr
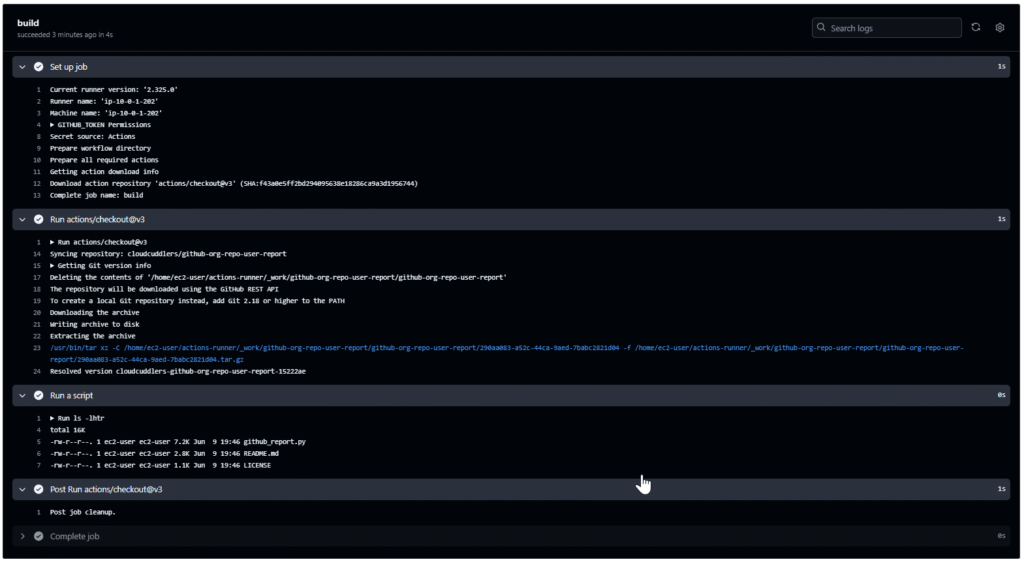
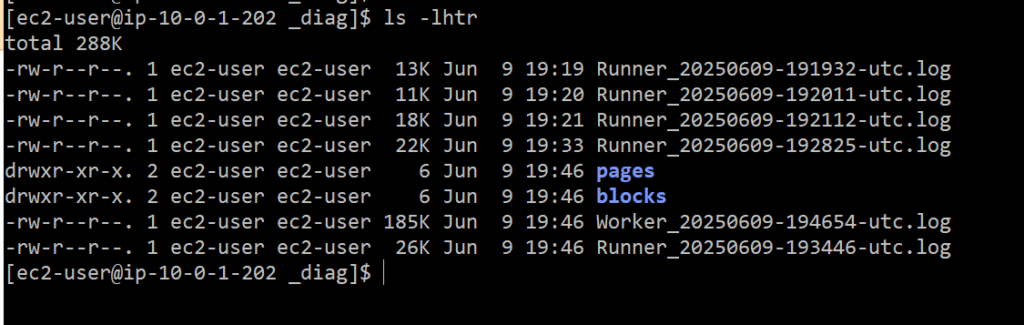
You can check the logs of the job in the _diag folder.
Security Best Practices
- Regularly update your runner software.
- Limit runner permissions using GitHub’s token permissions.
- Employ network-level security controls and monitoring.
- Restrict runner access to sensitive data and repositories.
Setting up a self-hosted GitHub Action Runner empowers developers with enhanced control, security, and flexibility. Following the outlined steps will ensure a reliable, customized, and secure CI/CD pipeline suitable for various development and production scenarios.