IaC (Infrastructure as Code) is used to provision and manage infrastructure using configuration files. Terraform is an open-source IaC tool that provisions resources from any infrastructure provider using HCL (HashiCorp Configuration Language). It is adopted by many reputed organizations for countless benefits, such as keeping track of provisioned resources with a state file.
There are many use cases where users want to use Terraform IaC instead of the traditional way of creating cloud resources from the console. If users want to create infrastructure from scratch, they can do it easily, but to shift and start using Terraform from existing resources is a daunting task. Replicating the existing resources in the Terraform configuration files would be a time-consuming task If there are huge collection of resources.
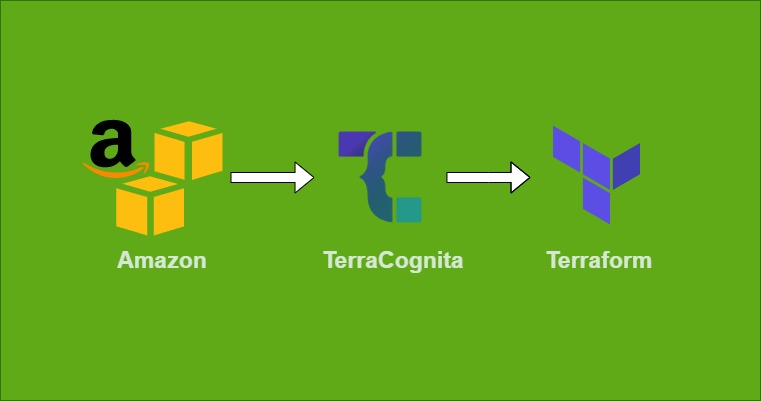
The purpose of this post is to make this transition easier by using TerraCognita.
What is TerraCognita?
TerraCognita is an open-source “reverse Terraform” tool that lets people import their infrastructure into Terraform configuration files. At the time of writing, Terracognita imports AWS, GCP, AzureRM, and VMware vSphere cloud providers as a Terraform (v1.1.9) resource or state. For more information, check out their website here.
In this article, I will import the VPC and S3 into Terraform
Prerequisites:
- AWS account
- AWS CLI installed and configured
- Terraform installed
Step 1 Let’s verify the Terraform and AWS CLI versions. To verify, run the aforementioned command.
terraform --version
aws --version
output must be:
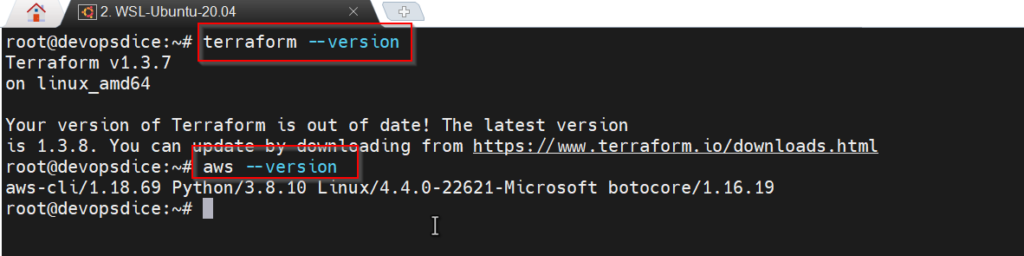
If Terraform and AWS CLI are not installed then follow the mentioned link
Step 2 Install TerraCognita
In this demo, I am using Ubuntu 20.04 and mentioning all the commands for the installation. For more detail, kindly visit https://github.com/cycloidio/terracognita
curl -L https://github.com/cycloidio/terracognita/releases/latest/download/terracognita-linux-amd64.tar.gz -o terracognita-linux-amd64.tar.gz
tar -xf terracognita-linux-amd64.tar.gz
chmod u+x terracognita-linux-amd64
sudo mv terracognita-linux-amd64 /usr/local/bin/terracognita
terracognita --help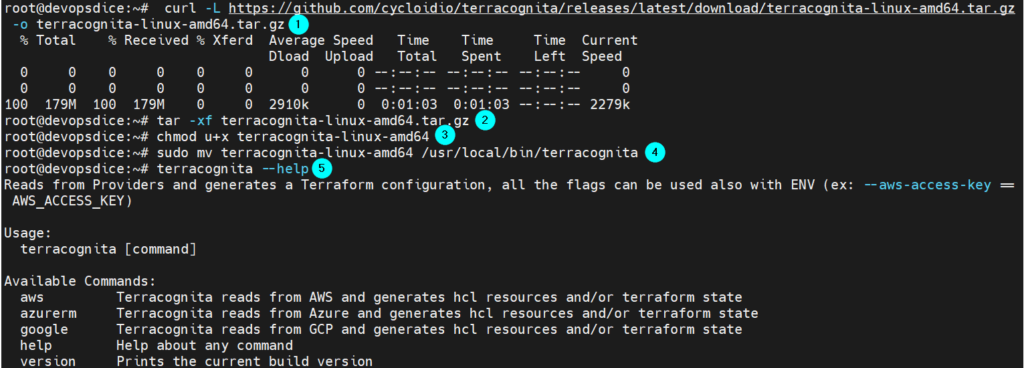
Step 3 Once installed, create a new directory for your work and run the mentioned command.
(i) Import Terraform configuration files into the single main.tf
terracognita aws --hcl main.tf --tfstate terraform.tfstate --aws-default-region us-east-1 -i aws_vpc -i aws_s3_bucket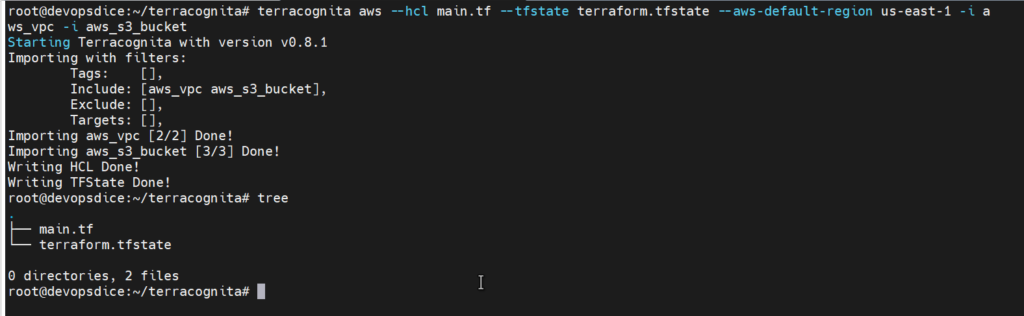
(ii) Terracognita can generate Terraform Modules directly when importing. To enable this feature, you’ll need to use the –module {module/path/name), and the command will be
terracognita aws --module devops --tfstate terraform.tfstate --aws-default-region us-east-1 -i aws_vpc -i aws_s3_bucket
To break down this command
- aws is the provider.
- –hcl is the language the code will be written in > to a file named main.tf
- –module enable is you required terraform modules
- — tfstate will prompt it to write the state file > naming it terraform.tfstate
- –aws-default-region region your resources are in > input your correct region
- –i to only include, List of resources to import, this names are the ones on TF (ex: aws_vpc). If not set then means that all the resources will be imported