Amazon Elastic Compute Cloud (EC2) provides scalable computing resources in the AWS cloud. Once you launch an EC2 instance, the next step is connecting to it securely. Depending on your use case, there are multiple methods to access an EC2 instance.
In this blog, we’ll cover different ways to connect to your EC2 instance, depending on your needs and preferences.
Prerequisites
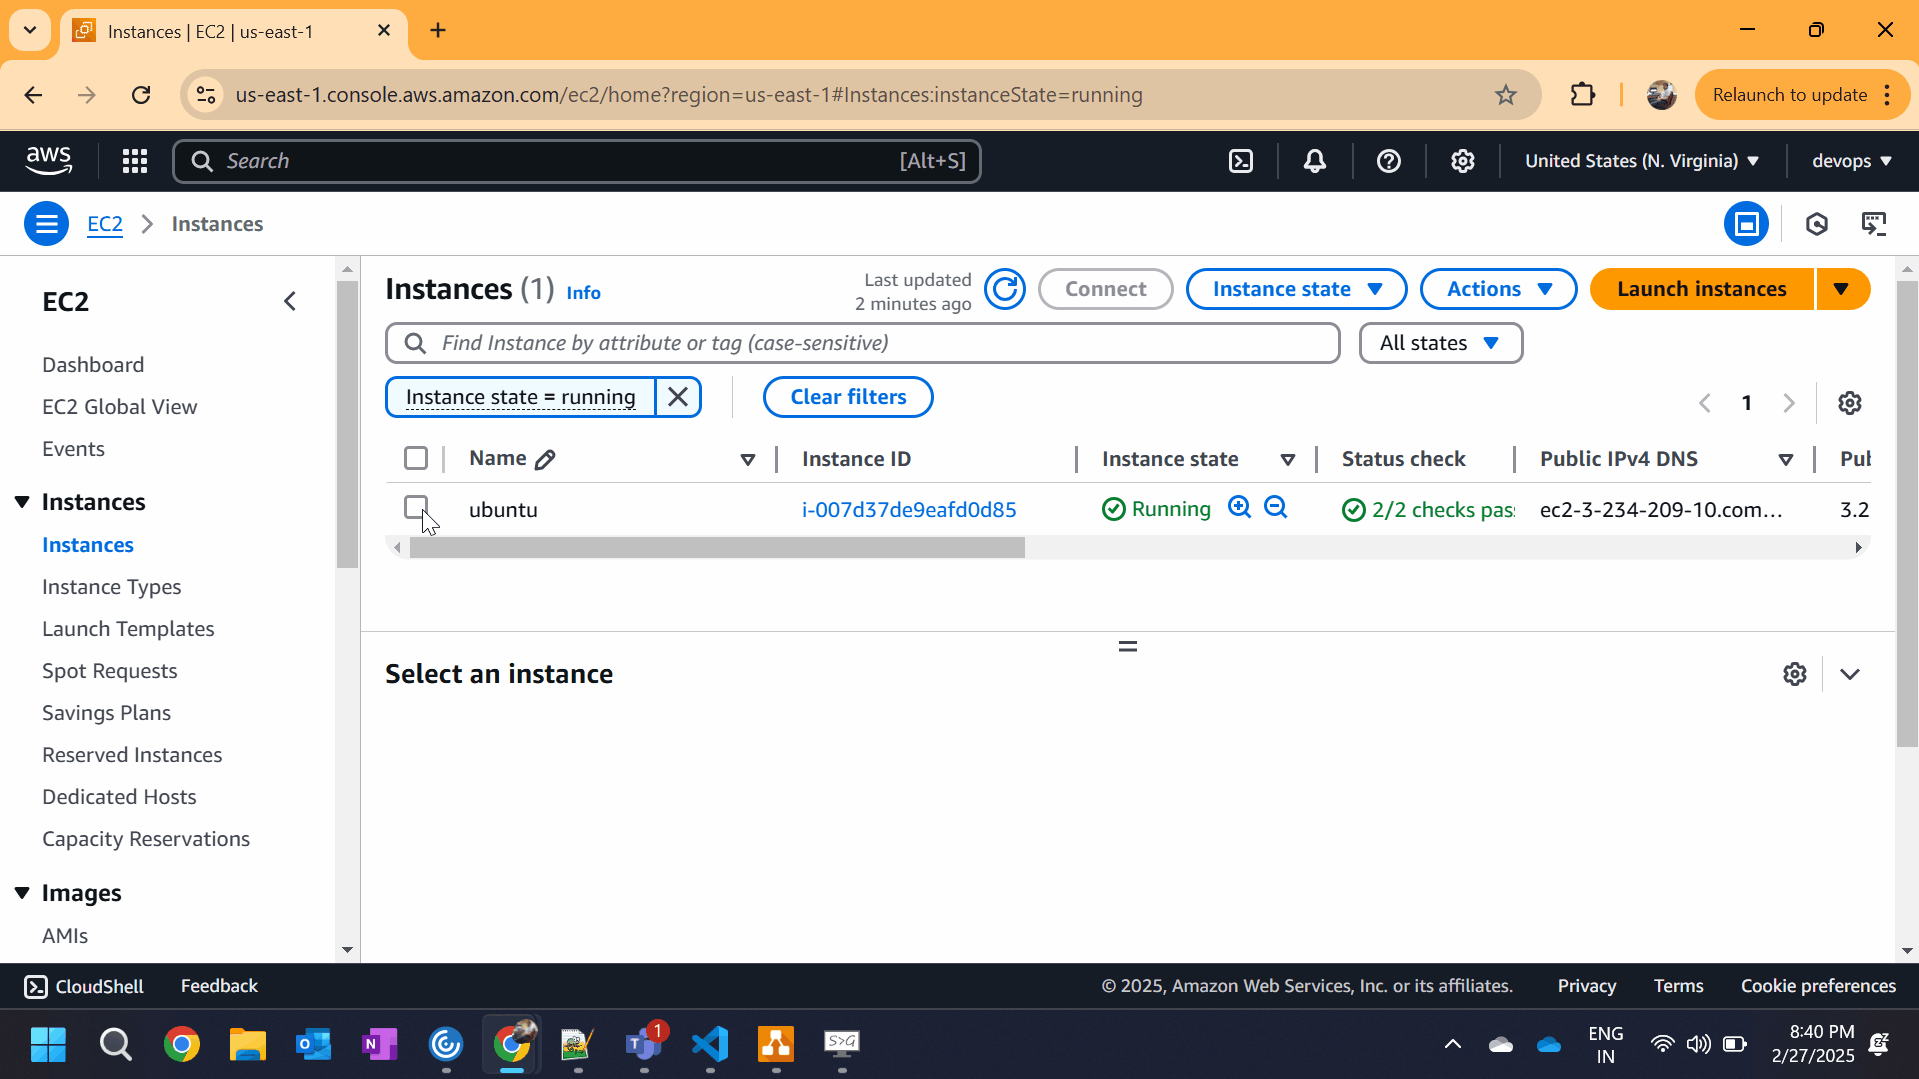
A running EC2 instance on AWS Cloud. In my case, I have an Ubuntu 24.02 ec2 instance with a public IP.

Option 1: Connecting via SSH
SSH (Secure Shell) is the most common and secure method for remotely accessing a Linux-based AWS EC2 instance. This method allows you to run commands on your EC2 instance securely from your local machine.
Steps to Connect via SSH
Step 1: Locate Your EC2 Instance Details
Before connecting, gather the following details from the AWS Management Console:
- Public IP Address (or Public DNS) of the instance
- SSH Key Pair (.pem file) used when launching the instance
- Default Username (based on the Linux distribution)
| Linux Distribution | Default Username |
|---|---|
| Amazon Linux | ec2-user |
| Ubuntu | ubuntu |
| RHEL/CentOS | ec2-user or root |
| Debian | admin |
| SUSE Linux | ec2-user or root |
Step 2: Open a Terminal (Linux/Mac) or Command Prompt (Windows)
- Linux/macOS users: Open Terminal.
- Windows users: Use PowerShell or install Git Bash for a Linux-like terminal.
Step 3: Connect to Your EC2 Instance Using SSH
Use the following command format:
ssh -i my-key.pem <user_name>@<public_ip>- Replace
my-key.pemwith your key file name. - Replace
<user_name>with the correct username for your Linux distribution. - Replace
<public_ip>with your instance’s public IP or DNS.

Option 2: Connecting via AWS Systems Manager Session Manager (No SSH Required)
AWS Session Manager, a feature of AWS Systems Manager (SSM), allows secure browser-based shell access to EC2 instances without SSH keys, without a public IP, and without opening port 22. This method is highly secure and ideal for managing private instances in a VPC (Virtual Private Cloud).
Why Use Session Manager?
- No Need for SSH Keys – No key management required
- Works Without Public IP – No need to expose instances to the internet
- IAM-Based Authentication – Granular access control with AWS Identity and Access Management (IAM)
- Auditable – Logs session activity to AWS CloudTrail and Amazon S3
- No Additional Software Needed – Works directly from the AWS console
How to Connect to an EC2 Instance Using Session Manager
Follow these steps to set up and use Session Manager to connect to your EC2 instance.
Step 1: Attach the Required IAM Role to Your EC2 Instance
To allow your EC2 instance to communicate with the AWS Systems Manager, attach an IAM Role with the necessary permissions.
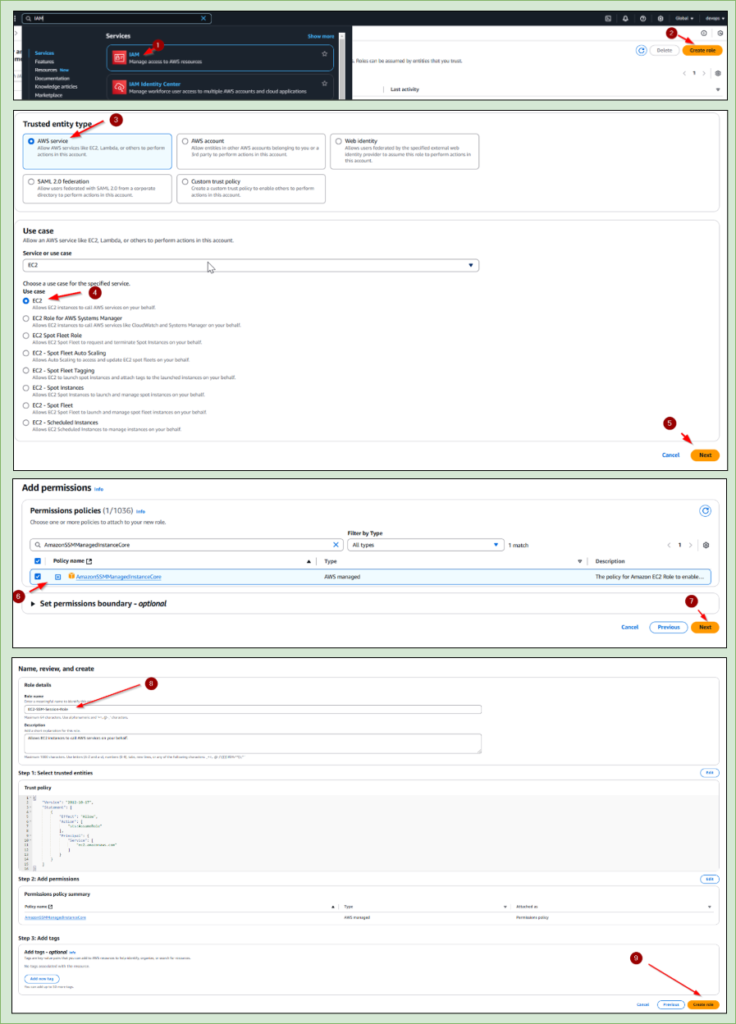
Create an IAM Role for EC2:
- Go to AWS Console → Open IAM Service
- Navigate to Roles → Click Create Role
- Select AWS Service → Choose EC2
- Attach Policies:
AmazonSSMManagedInstanceCore(Grants EC2 access to Session Manager)
- Name the Role (e.g.,
EC2-SSM-Session-Role)Click Create Role
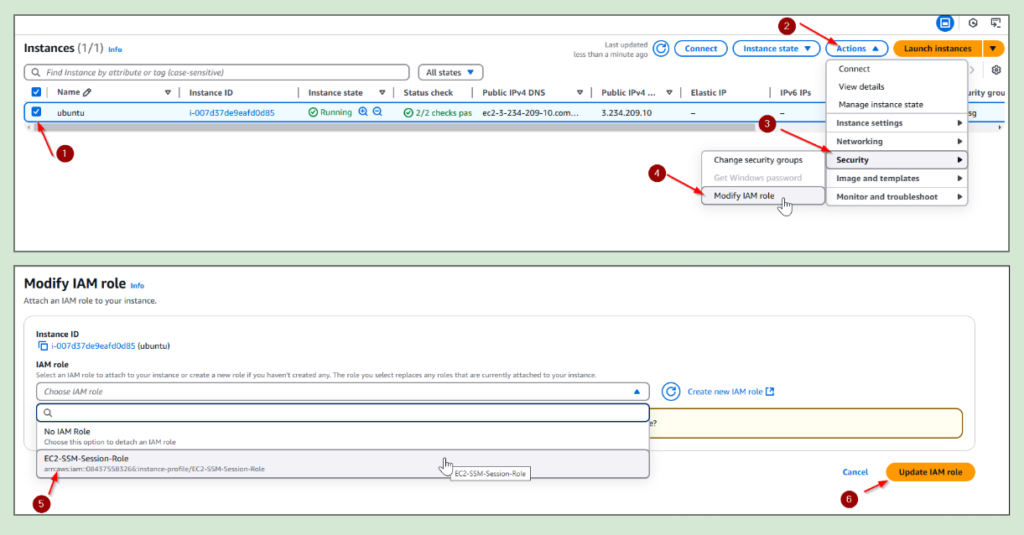
Attach the Role to Your EC2 Instance:
- Go to AWS Console → Open EC2
- Select Your Instance → Click Actions
- Click Security → Choose Modify IAM Role
- Select the IAM Role (
EC2-SSM-Session-Role)Click - Update IAM Role
Step 2: Install the SSM Agent on the EC2 Instance (If Not Pre-Installed)
Amazon Linux and Ubuntu AMIs usually come with AWS Systems Manager Agent (SSM Agent) pre-installed. If not, install it manually:
Amazon Linux & Amazon Linux 2:
sudo yum install -y amazon-ssm-agent
sudo systemctl enable amazon-ssm-agent
sudo systemctl start amazon-ssm-agent
Ubuntu/Debian:
sudo snap install amazon-ssm-agent
sudo systemctl enable amazon-ssm-agent
sudo systemctl start amazon-ssm-agent
Windows Instances (PowerShell):
Invoke-WebRequest -Uri https://s3.amazonaws.com/ec2-downloads-windows/SSMAgent/latest/win64/amazon-ssm-agent.msi -OutFile amazon-ssm-agent.msi
Start-Process msiexec.exe -ArgumentList '/i amazon-ssm-agent.msi /quiet' -Wait
Step 3: Connect to EC2 Using Session Manager
Once the IAM role is attached and the SSM Agent is running, you can connect to your EC2 instance.
Using AWS Console:
- Go to AWS Console → Open EC2 Dashboard
- Select the EC2 Instance
- Click Connect
- Choose Session Manager → Click Start Session
Option 3: Connecting via AWS EC2 Instance Connect (Amazon Linux & Ubuntu)
EC2 Instance Connect is an AWS-native feature that allows you to connect to your Amazon Linux and Ubuntu EC2 instances directly from the AWS Management Console, using a browser-based terminal session — without needing SSH keys, a terminal client, or any extra software.
It’s the simplest way to quickly access your instance for basic tasks and troubleshooting.
Prerequisites for Using EC2 Instance Connect
Before using EC2 Instance Connect, your instance must meet these conditions:
- Supported Operating Systems
- Amazon Linux 2 (officially supported)
- Ubuntu 20.04 or later (EC2 Instance Connect can be manually installed if needed)
- Instance Configuration
- Your EC2 Security Group must allow inbound traffic on port 22 from your IP address (at least temporarily).
- An instance must have a public IPv4 address (for browser access) OR
- An instance is in a private subnet with a Bastion Host (for accessing via private connectivity).
- Installed EC2 Instance Connect Service
- For Amazon Linux 2, EC2 Instance Connect is pre-installed. For Ubuntu, you may need to install it manually:
sudo apt-get update
sudo apt-get install ec2-instance-connect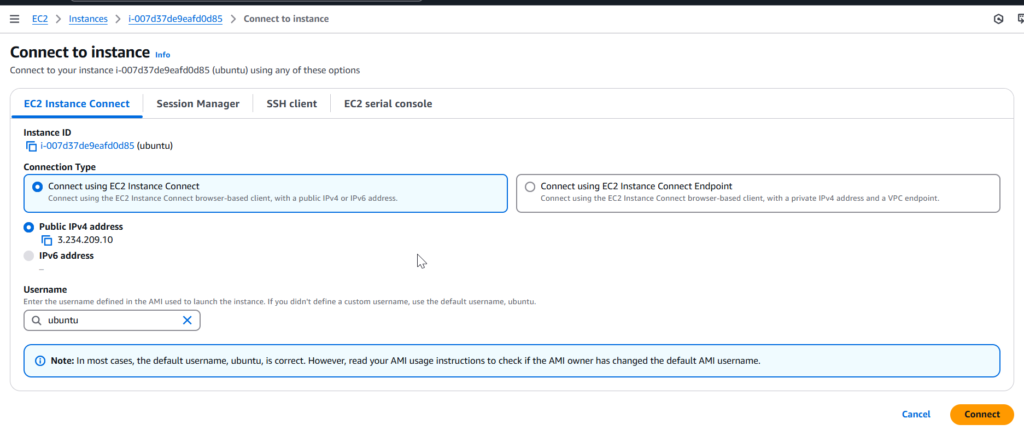
Comparison in Connection Methods
| Feature | EC2 Instance Connect | SSH Client | AWS Session Manager |
|---|---|---|---|
| Works Without SSH Keys | ✅ | ❌ | ✅ |
| Works Without Public IP | ❌ | ❌ | ✅ |
| Works in Private Subnet | ❌ | ❌ | ✅ |
| Audited & Logged (CloudTrail) | ❌ | ❌ | ✅ |
| Easy Browser Access | ✅ | ❌ | ✅ |
| Best For | Quick Troubleshooting | Regular Admin Access | Private Secure Access |